Tuesday, April 28, 2009

The Demolition is Finished!

Last weekend we finished demolishing the other half of the basement. Here are some pictures of what it looked like beforehand:

Where Our Future Closet Will Be.

Half of Our Old Laundry Room.

The Outside of Our Old Room.

Here is something I uncovered while tearing down our bedroom wall from the picture above. This was behind the first layer of sheetrock...

If at first you don't succeed; try, try, try, try, try, try again...
Finally! There's that dang stud!

That's a good example of why I have to completely redo everything, huh?

Here are some after pictures:

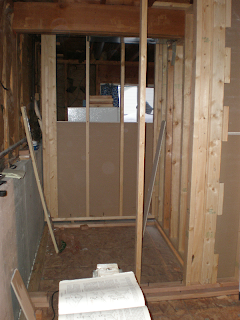
Looking Across the Basement

What Used to Be Our Bedroom

The next steps will be to get the plumbing done for the floor drains. That is already broken up and exposed. Once we get that done, we will be able to get it inspected, and then pour that concrete. After that, we should really be able to rock the framing!

Saturday, April 18, 2009

More Bedroom Partitions!

This Saturday we finished all the partitions we needed to finish to move into the first bedroom. As you may remember we are living downstairs while we do this basement remodel. The first picture shows the closet that has the two partitions we put up today. It was pretty tricky to put up one of the partitions because went around the main support and HVAC supply line. We pretty much got it in one shot with a little struggle, but it really turned out great!

Bedroom Closet

Partition that Separates Bedroom From Storage Room

Once we got the partitions done we sheet rocked the storage room side of the partitions. This is because we will be moving the water heater and installing a new furnace in the storage and both will got up close to the wall. However, we only sheet rocked one side because we still have electrical work and inspections to do before we sheet rock the bedroom side. Notice how good of a job we did sheet rocking around the main support and HVAC line. Measure twice and cut once!

Storage Room - Water heater will go in the far corner
and the furnace will go right next to it.

Bedroom closet extending into the storage room

Tomorrow is Sunday and we will put up plastic over the areas we can't sheet rock and we will move into this bedroom. Then, we will demolish the rest of the basement!

Friday, April 17, 2009

First Wall Partitions

What makes our basement remodel so hard is that we have to live through it. Literally. There are only two bedrooms upstairs and those bedrooms are used by our two kids. This means that our bedroom is still not torn out, but it needs to be. The plan is to get this first room in the basement framed, plastic it off, and then move our bedroom into it. This will allow us to rip down the rest of the basement and continue putting the sandwich subfloor down throughout rest of the basement.

We are hoping to get the partitions up fast. What has been helping this whole process go faster is to cut the 2x4's ahead of time (during the work week) and then nail them together on the weekend with an air powered Hitachi NR 83A Strip Nailer that I borrowed from my uncle. This nailer is great for shoot the 3.25" nails into the studs to construct the partitions. Of course, if it can handle the 3.25" nails, it really great for the 2.25" nails that secure the base plate to the subfloor. This is much better than trying to nail the 2x4's together by hand!

Here are some pictures of the first partitions we have put up. Note that the partitions are built to be floating walls. Due to the crazy soil we have in Colorado, floating walls are necessary to prevent your walls from being destroyed.


Here is a picture of what the closet will look like. So far we only have the base plates down, but we are hoping to get the partitions done for the closet this weekend.

Like I said a little bit ago: we have to live through this basement remodel. This makes for some interesting construction challenges like when the subfloor starts to encroach on the laundry room area. As you can see in the next picture, we had to temporarily put pieces of insulation and plywood down under the washer and dryer to keep them level.

Stay tuned for more progress this coming weekend!

Thursday, April 16, 2009

Starting the Sandwich Subfloor

The first step in our basement remodel is to fasten the sandwich subfloor to the concrete slab. As you can see in the pictures below we put down 1" of polyisocyanurate foam with aluminum foil on the sides. To prevent any cold or moisture from coming up through this insulation we used Tyvek tape (aka sheathing tape) to seal the seams of the insulation. The following pictures show the foam with taped seams:

Did you see my Dad taking a measurement for the next piece of insulation? He's been a huge help in helping with all of the house remodeling and finishing we have been involved in.

On top of the insulating foam we used 3/4" tongue and groove OSB to finish the floor. Once all of these pieces were in the proper places we used a Hilti DX350 nail gun to secure the sandwich subfloor to the concrete slab using 2.75" nails. The following pictures show the floor fastened with the 3/4" tongue and groove OSB:

The edges of the subfloor are spaced at leat 1/2" from the foundation walls. This allows for expansion. That gap is filled with spray foam so that the entire floor will be insulated. The OSB makes it so the floor is sturdy for some types of flooring like tiling.

Well, almost the whole basement will be done with this subfloor. The storage room will not be to allow for proper drainage of the floor drain.

First Tear Down

The last people that lived in our house "finished" our basement. However, they did not get a permit and they did not follow sound building practices. For example, all the studs in the non-load bearing partitions were more than 16" apart from each other and some studs were even more than 24" from each other. I suppose that is one way to cut your basement finish costs...

Needless to say, we had to tear out everything that they did. Since we are living in our basement while we do this remodel we tore down the west side of the basement first. Here are some pics of what that looked like right after we tore everything out:


Sunday, April 12, 2009

First Post

Hello World! Welcome to our blog detailing our crazy adventure of finishing our basement. We just started with the building recently. Soon, we will have pictures of the whole deal to show you, so stay tuned!